Sous vide has become one of the most exciting and approachable cooking techniques for home cooks. If you’re new to this culinary method, you might wonder, What is the first thing I should sous vide? The answer depends on your taste preferences, but the beauty of sous vide is its versatility and foolproof nature, making it perfect for beginners. Whether you’re a meat lover, an egg enthusiast, or a fan of perfectly cooked vegetables, precision cooking ensures consistent, flavorful results every time.
This article will guide you through the basics of sous vide, essential tools, beginner-friendly recipes, and common mistakes to avoid. By the end, you’ll be confident in choosing and preparing your very first precision cooking dish.
Let’s dive in and unlock the secrets of sous vide cooking!
Why Choose Sous Vide?
1. What Makes Sous Vide Unique?
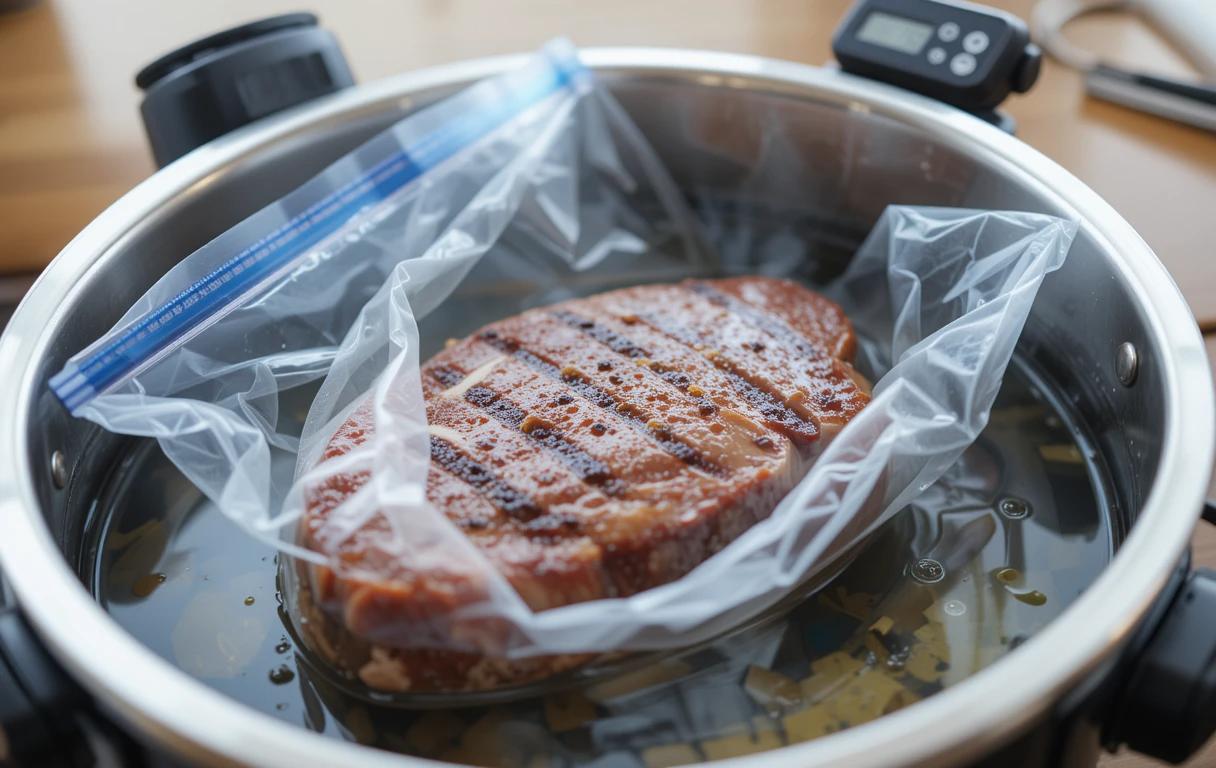
Sous vide, which means “under vacuum” in French, is a technique where food is vacuum-sealed in a bag and cooked in a precisely controlled water bath at a consistent temperature. Unlike traditional methods where heat can fluctuate, precision cooking ensures your food is cooked evenly from edge to center. This makes it ideal for beginners since it eliminates guesswork and the risk of overcooking.
For instance, if you’re cooking a steak, the water bath temperature is set to the exact doneness you desire. Once the steak reaches the target temperature, it cannot overcook, offering unparalleled consistency. This precision is why many professional chefs and home cooks alike rave about sous vide.
2. Benefits of Sous Vide for Beginners
If you’re new to cooking or looking for foolproof ways to enhance your dishes, sous vide offers numerous advantages:
- Perfect Results Every Time: Sous vide allows even novice cooks to achieve restaurant-quality meals. Whether it’s a tender chicken breast or a perfectly soft-boiled egg, you’ll avoid undercooking or overcooking.
- Hands-Off Convenience: Once your food is sealed and placed in the water bath, the process is almost entirely hands-free. This means you can focus on other tasks while your meal cooks.
- Enhanced Flavor: The vacuum-sealed environment locks in moisture and prevents flavor loss, resulting in more tender and flavorful dishes.
- Healthier Cooking: With less need for oils or fats, precision cooking is a healthier alternative to frying or pan-searing.
3. Perfect for Experimentation
For beginners, sous vide is an excellent way to learn about different cooking techniques and temperatures. By experimenting with different times and temperatures, you can customize your food to your exact preferences. For example, you might try:
- A medium-rare steak at 130°F (54°C) for 1-2 hours.
- A soft-boiled egg at 145°F (63°C) for 45 minutes.
- Carrots at 183°F (84°C) for a buttery texture.
Essential Sous Vide Equipment
1. Sous Vide Machine (Immersion Circulator)
The sous vide machine is the star of the show. It heats the water bath to a precise temperature and circulates the water to maintain uniformity. For beginners, affordable and user-friendly models like the Anova or Joule are great starting points. Look for machines with easy-to-read displays and preset functions to simplify the process.
2. Vacuum Sealer or Alternatives
While a vacuum sealer provides the best results, you don’t need one to start. Ziploc bags with a water displacement method work just as well. To do this:
- Place your food in the bag and seal it partially.
- Slowly lower the bag into the water bath until the air is pushed out, then seal it fully.
This technique ensures your food stays submerged during cooking.
3. Optional Accessories
For a seamless experience, consider adding the following accessories to your sous vide setup:
- A Large Pot or Container: To hold the water bath.
- Bag Clips or Racks: To secure bags and ensure even cooking.
- A Cast Iron Skillet: For finishing sears on meats after precision cooking cooking.
Best Foods to Sous Vide First
One of the best things about sous vide is its versatility. For beginners, starting with easy, forgiving recipes will help build confidence. Here are some of the best foods to precision cooking for your first culinary adventure.
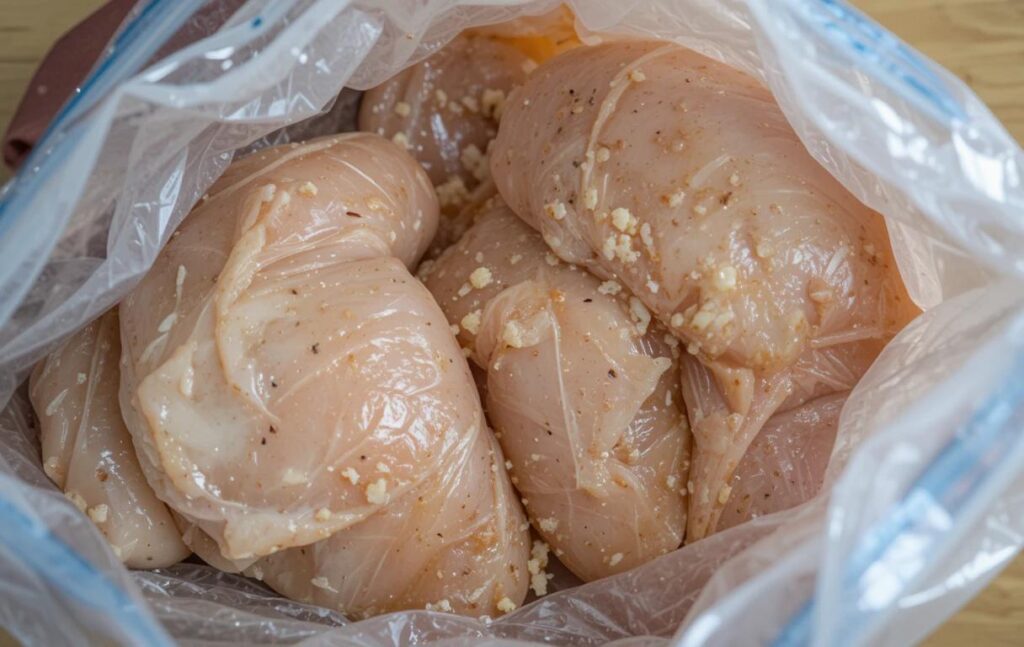
1. Chicken Breast: A Beginner’s Staple
Chicken breasts are notorious for drying out with traditional cooking methods, but sous vide eliminates this problem entirely. The consistent water bath ensures moist, tender chicken every time.
- Temperature and Time Recommendations:
- Juicy and tender: 145°F (63°C) for 1.5–2 hours.
- Traditional texture: 150°F (65°C) for 1–1.5 hours.
- Seasoning Suggestions:
- Simple salt and pepper, or marinate with garlic, lemon, and rosemary for added flavor.
- Seal with a drizzle of olive oil to retain moisture.
- Finishing Tip:
After cooking, sear the chicken in a hot skillet for 1-2 minutes on each side to add a golden crust.
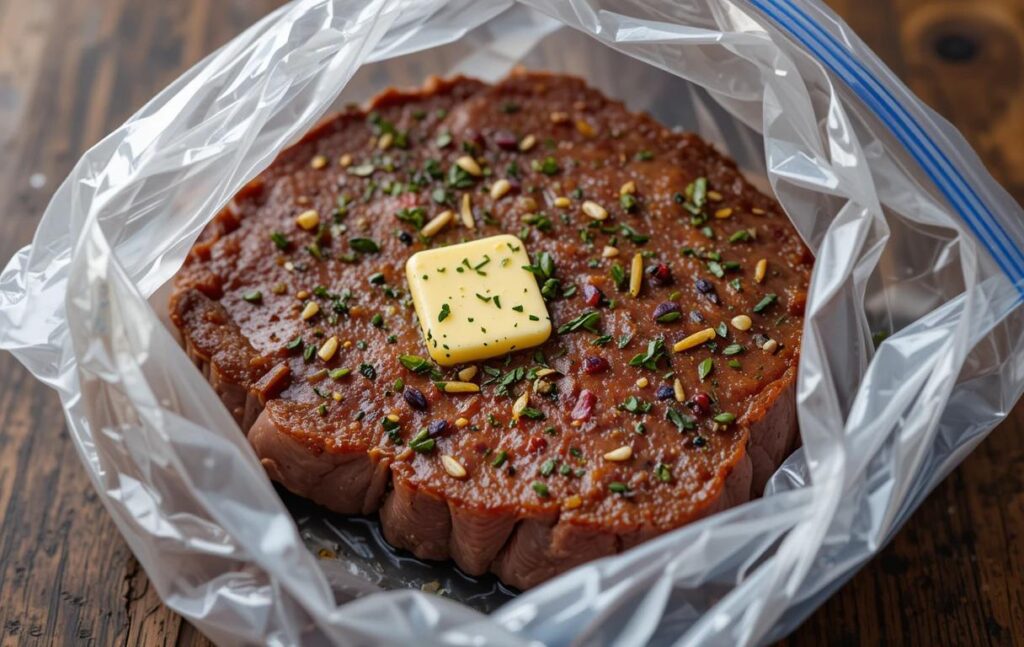
2. Steak: Perfecting a Classic
Steak is one of the most popular sous vide options for good reason. It’s practically impossible to mess up, even for beginners. You can customize the doneness to your liking, and precision cooking ensures every bite is cooked to perfection.
- Temperature and Time Recommendations:
- Rare: 125°F (52°C) for 1–2 hours.
- Medium-rare: 130°F (54°C) for 1–2 hours.
- Medium: 140°F (60°C) for 1–2 hours.
- Seasoning Suggestions:
- Keep it simple with salt and pepper or use a dry rub. Add garlic and thyme to the bag for enhanced flavor.
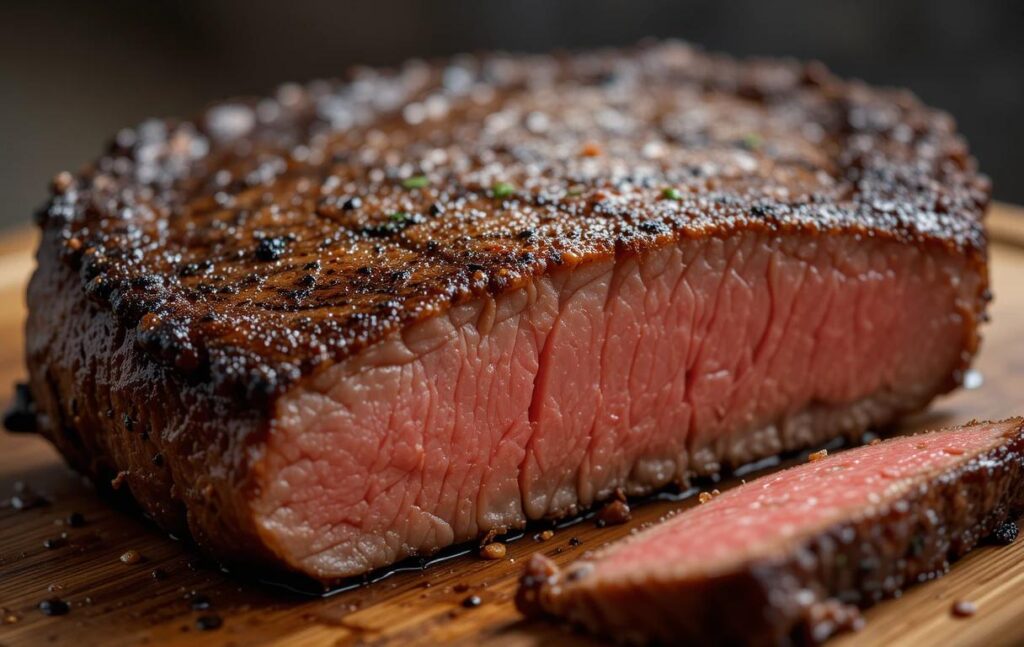
- Finishing Tip:
After cooking, sear the steak in a cast iron skillet or with a blowtorch for a perfect crust.
3. Eggs: The Ultimate Beginner Test
Eggs are a fantastic, affordable choice for sous vide beginners. Their versatility allows you to experiment with different textures, from soft-boiled to custardy yolks.
- Temperature and Time Recommendations:
- Soft-boiled egg: 145°F (63°C) for 45 minutes.
- Custardy yolk: 148°F (64.5°C) for 1 hour.
- Fully set white and creamy yolk: 165°F (73°C) for 14 minutes.
- Serving Ideas:
- Add soft-boiled sous vide eggs to ramen.
- Serve creamy eggs over avocado toast or salads.
4. Vegetables: Precision in Simplicity
Vegetables are often overlooked in sous vide cooking, but they’re an excellent choice for beginners. This method enhances their natural sweetness and ensures consistent doneness.
- Temperature and Time Recommendations:
- Carrots: 183°F (84°C) for 1 hour – tender with a slight bite.
- Asparagus: 185°F (85°C) for 10 minutes – perfectly tender and bright green.
- Potatoes: 194°F (90°C) for 1.5 hours – ideal for mashed potatoes.
- Seasoning Suggestions:
- Add butter, garlic, or herbs to the bag before cooking.
- Finish with a sprinkle of salt and a drizzle of olive oil.
Why These Foods Are Ideal for Beginners
- Chicken and Steak: Forgiving and easy to prepare, they highlight the precision of sous vide cooking.
- Eggs: Quick, inexpensive, and versatile – great for experimenting with temperatures.
- Vegetables: Showcase how precision cooking retains nutrients and enhances natural flavors.
Step-by-Step Guide to Sous Vide Cooking
Now that you know which foods are perfect for beginners, it’s time to learn how to prepare and cook your first sous vide dish. Follow these simple steps to ensure your first precision cooking experience is smooth and successful.
1: Gather Your Equipment and Ingredients
Before you begin, make sure you have everything you need. Here’s a checklist:
- Sous vide machine (immersion circulator): Set it up in a large pot or water container.
- Vacuum sealer or resealable freezer bags: Use the water displacement method if you don’t have a vacuum sealer.
- Cooking essentials: Your chosen ingredient, seasonings, and optional extras like herbs, butter, or oil.
- A skillet or torch (optional): For searing or finishing meats.
2: Prepare Your Ingredients
- Season Generously:
- For proteins like chicken or steak, sprinkle salt and pepper evenly on all sides. Add extras like garlic, thyme, or butter to the bag for additional flavor.
- For vegetables, toss them with a little olive oil, salt, and any preferred seasonings before sealing.
- Seal the Bag:
- If you’re using a vacuum sealer, place your seasoned ingredients in the bag and remove all air.
- If using resealable freezer bags, try the water displacement method:
- Partially seal the bag and slowly submerge it into the water bath.
- The pressure of the water will push air out of the bag. Once the food is submerged, seal the bag fully.
3: Set Up Your Sous Vide Machine
- Fill the Container with Water:
Use a large pot, sous vide container, or even a plastic storage bin. The water level should be high enough to fully submerge your food bag but below the machine’s maximum limit. - Attach the Sous Vide Machine:
Clip your sous vide circulator to the side of the container and plug it in. - Set the Temperature and Timer:
- Follow the recommended time and temperature for your chosen ingredient (refer to Part 3).
- For instance, set your machine to 130°F (54°C) and cook a steak for 1.5 hours for medium-rare perfection.
4: Place the Bag in the Water Bath
- Submerge Completely:
Ensure your sealed bag is fully submerged in the water bath. If it floats, use clips or weights to keep it underwater. - Hands-Free Cooking:
Once your food is in the bath, the sous vide machine takes care of the rest. This is your chance to prepare sides or relax while the magic happens.
5: Finish and Serve
Once your sous vide cooking is complete, it’s time to add the finishing touches for flavor and presentation.
Proteins (Chicken, Steak, etc.):
- Remove the food from the bag and pat it dry with paper towels. Moisture on the surface can prevent a proper sear.
- Heat a skillet with a small amount of oil until it’s smoking hot.
- Sear the meat for 1–2 minutes per side to create a flavorful crust.
Vegetables:
- Drain excess liquid from the bag.
- Serve as is or roast/grill for a smoky, caramelized finish.
Eggs:
- Crack the sous vide eggs directly over toast, salads, or rice bowls. No finishing step is needed!
Tips for First-Time Success
- Monitor Water Levels: Check periodically to ensure the water hasn’t evaporated below the minimum level.
- Adjust Finishing Time: Be careful not to over-sear your proteins after sous vide cooking. The crust should form quickly without further cooking the interior.
- Trust the Process: Sous vide might feel slow at first, but the results are worth it. Let the machine do the work!
Common Mistakes to Avoid When Sous Vide Cooking
While sous vide is a forgiving cooking method, there are a few common mistakes beginners make. Avoid these pitfalls to ensure your first dish turns out perfectly.
1. Not Sealing the Bag Properly
Proper sealing is critical for sous vide cooking. If air is left in the bag, it can cause your food to float, leading to uneven cooking.
How to Avoid It:
- Use a vacuum sealer for a tight seal.
- If using a resealable freezer bag, apply the water displacement method (described in Part 4). Ensure no air bubbles remain.
- Check the seal before placing the bag in the water bath to avoid leaks.
2. Cooking at the Wrong Temperature
One of the most important aspects of sous vide cooking is setting the correct temperature. A temperature that’s too high or low can ruin your dish.
How to Avoid It:
- Follow temperature guidelines specific to your ingredient (see Part 3).
- Invest in a reliable sous vide machine with precise temperature controls.
- Double-check recipes for time and temperature recommendations, especially for proteins like chicken and steak.
3. Skipping the Sear
For proteins like steak, chicken, or pork, searing is the final touch that enhances texture and flavor. Many beginners forget this step, leaving their food with an unappealing, pale appearance.
How to Avoid It:
- After sous vide cooking, pat your food dry with paper towels to ensure a proper crust.
- Use a hot cast iron skillet, grill, or torch to sear your proteins for 1–2 minutes per side.
- Add butter, garlic, or herbs during searing for extra flavor.
4. Overcrowding the Water Bath
If you add too many bags to your water bath, it can prevent proper water circulation, leading to uneven cooking.
How to Avoid It:
- Make sure there’s enough space between the bags for water to circulate.
- For large batches, use a precision cooking container with a rack to keep bags separated.
5. Ignoring Water Levels
As water evaporates during long sous vide cooks, the water level may drop below the minimum required for your machine, which can lead to incomplete cooking.
How to Avoid It:
- Use a lid or plastic wrap to minimize evaporation.
- Check water levels periodically, especially for cooks longer than 2 hours.
- Add warm water if needed to maintain the correct level.
6. Using Low-Quality Ingredients
While sous vide enhances flavors, it won’t magically turn poor-quality ingredients into a gourmet meal. Starting with fresh, high-quality ingredients ensures the best results.
How to Avoid It:
- Use fresh cuts of meat, in-season vegetables, and quality spices.
- Avoid freezer-burned or overly processed ingredients.
7. Relying Solely on Sous Vide for Flavor
Sous vide excels at cooking food evenly but doesn’t add browning, caramelization, or smoky flavors. These come from finishing techniques like searing, grilling, or broiling.
How to Avoid It:
- Incorporate finishing touches, like searing proteins or roasting vegetables.
- Add fresh herbs, butter, or sauces to your dish after cooking for extra flavor.
8. Overcooking with Long Sous Vide Times
While sous vide is forgiving, leaving food in the water bath too long can negatively affect texture, especially with delicate proteins like fish or eggs.
How to Avoid It:
- Follow recommended cooking times for your ingredient.
- For extended cooks, like tough cuts of meat (e.g., brisket or pork shoulder), aim for the minimum time required to achieve tenderness.
9. Neglecting to Rest After Searing
Even though sous vide prevents overcooking, proteins need to rest after searing to allow juices to redistribute.
How to Avoid It:
- Let steaks or chicken rest for 3–5 minutes after searing before slicing.
- Cover with foil during the resting period to retain warmth.
10. Forgetting to Experiment
While sticking to recipes is a great starting point, sous vide is an excellent method for experimenting with temperatures, flavors, and textures. Some beginners hesitate to try new combinations, missing out on the technique’s full potential.
How to Avoid It:
- Try different marinades, herbs, or spices in the vacuum bag.
- Experiment with varying temperatures to see how they affect texture.
FAQs About Sous Vide for Beginners

1. Is Sous Vide Safe for Cooking?
Yes, sous vide is safe as long as you follow basic food safety guidelines. Cooking at precise temperatures ensures your food reaches a safe internal temperature to eliminate harmful bacteria. For example:
- Chicken is safe at 165°F (74°C) for traditional cooking, but with precision cooking, it’s safe at 145°F (63°C) if cooked for 1.5 hours, as the extended time pasteurizes the meat.
Always handle food safely by sealing it properly and avoiding contamination.
2. Do I Need Expensive Equipment to Start?
No, you don’t need to break the bank to begin sous vide cooking. Many affordable immersion circulators are available, and you can use everyday items like a large pot and resealable freezer bags instead of purchasing specialized containers or vacuum sealers.
3. Can I Sous Vide Without a Vacuum Sealer?
Yes! While a vacuum sealer is convenient, the water displacement method works just as well. Simply place your food in a freezer bag, seal it partially, and slowly lower the bag into the water bath to push the air out before sealing it completely.
4. What Foods Should I Avoid Sous Viding?
Some foods don’t benefit from sous vide cooking:
- Delicate fish: Overly delicate fish like flounder or tilapia may fall apart.
- Leafy greens: They wilt too much and don’t retain structure.
- Bread or pasta: These don’t gain anything from sous vide precision.
5. How Do I Store Sous Vide Food?
precision cooking is excellent for meal prepping. After cooking:
- Chill the sealed bag in an ice water bath for 15–20 minutes.
- Store in the fridge for up to 5 days or freeze for up to 3 months.
Reheat by placing the sealed bag back into a water bath at the original cooking temperature for 30–60 minutes.
6. Does Sous Vide Use a Lot of Energy?
No, precision cooking machines are energy-efficient, especially when compared to ovens. They maintain consistent temperatures without using much electricity, making them a sustainable cooking method.
Conclusion: Start Your Sous Vide Journey
It is a game-changer for home cooking, offering precision, convenience, and consistent results that are hard to achieve with other methods. By starting with beginner-friendly recipes like chicken breast, steak, or eggs, and avoiding common mistakes, you’ll quickly master this technique.
The best part of sous vide is the freedom to experiment. Whether you’re perfecting a medium-rare steak or trying out tender vegetables, precision cooking helps elevate your culinary skills with minimal effort.
So, grab your precision cooking machine, pick your first recipe, and enjoy the journey of creating restaurant-quality meals in your kitchen. The possibilities are endless, and your cooking confidence will soar!
Sous Vide and Smoked East Coast Pastrami
Related Recipes
- “Tuna Tomato Sauce Pasta Recipe“: A tomato-based recipe showcasing another way to use tomatoes.
- “Baked Chicken Fettuccine Alfredo with Broccoli“: Another comforting dish that can be complemented with tomato-based sauces.
Ingredient-Focused Content
- “Lions Mane Mushroom Recipe“: Suggest using a tomato gravy as a flavorful addition for plant-based dishes.
Cooking Techniques and Enhancements
- “Mango Habanero Salsa“: Explore complementary uses of sauces and gravies for flavor diversity.